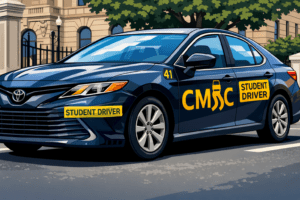


Learning how to parallel park step by step is the single skill most Massachusetts road test takers dread more than anything else on the evaluation. It fails more drivers than any other maneuver on the Massachusetts Class D road test. The good news is that parallel parking is entirely learnable. It is not a talent. It is a technique. Once you understand the visual reference points, the steering sequence, and the exact checkpoints that make the maneuver consistent, parallel parking becomes the most repeatable skill in your entire driving repertoire. This guide covers the complete step-by-step method, the mirror trick that professionals use, the 1-2-1 steering method explained in plain language, how to signal for parallel parking correctly, and exactly what the Massachusetts road test examiner watches for when you pull up to those cones.
Why Parallel Parking Fails More Massachusetts Road Tests Than Any Other Maneuver
Before covering the steps, understanding why parallel parking produces so many failures helps you avoid the traps.
Three errors appear together in failed parallel parking attempts more than any other combination. The driver contacts a cone. They finish more than 12 inches from the curb. They forget to signal before beginning or after completing the maneuver.
All three errors trace to the same root cause: the student practiced parallel parking in open spaces without cone markers, in a different vehicle than the test vehicle, without calibrating the specific visual reference points for that vehicle’s dimensions. Repetitions in the wrong setup build the wrong version of the skill. The correction is specific practice in the right setup with the right reference points. That is what this guide builds.
What You Need Before You Start Parallel Parking
Check Your Mirrors Before Every Attempt
Mirror setup is not the same as mirror checking. Before the maneuver begins, your driver-side mirror should show the lane behind you. Your passenger-side mirror should be angled low enough to show the curb line and the space beside your rear wheel. Many drivers leave the passenger mirror in its normal position throughout the maneuver and lose the most useful reference point they have for judging curb distance.
Adjust the passenger mirror downward before every parallel parking attempt, whether in practice or on the road test. This single adjustment is the difference between guessing your curb distance and seeing it directly.
Understand the Space Requirements
The parking space must be at least 1.5 times the length of your vehicle. For a standard sedan, that means approximately 20 to 25 feet of open space. On the Massachusetts road test, the RMV places cone markers approximately 20 to 25 feet apart to simulate this space. A compact car fits in 20 feet. Mid-size sedans need 22 to 24 feet.
Most drivers try to parallel park into spaces that are too small, which forces them into multiple correction moves under time pressure. Choosing the right space before committing is the first decision that separates confident parkers from anxious ones.
How to Parallel Park Step by Step
Step 1: Find the Right Space and Approach It Correctly
Signal right as you approach the parking space. Do not wait until you stop to activate your signal. Turn it on as soon as you identify the space, which gives drivers behind you time to react and create the room you need to maneuver.
Pull up parallel to the vehicle parked in front of the empty space. Position your vehicle approximately 2 to 3 feet from the side of the parked car. Your rear bumper should align roughly with the rear bumper of the parked vehicle in front of the space. This is your starting alignment. If you are too far forward, you will not have enough angle to enter the space cleanly. If you are too far back, your front will swing wide into traffic during the maneuver.
Stop here. Check your rearview mirror. Check your passenger-side mirror. Check your blind spot with a physical head turn. Confirm the space behind you is clear before the vehicle moves backward.
Step 2: Shift Into Reverse and Begin the First Turn
Shift into reverse. Turn the steering wheel fully to the right. One full rotation or until the wheel reaches its right-side limit. Begin reversing slowly. The speed of a slow walk is the correct pace throughout this maneuver. Speed removes your ability to observe and react. Slow is smooth. Smooth is accurate.
As you reverse, your vehicle’s rear begins moving toward the curb and your front begins swinging outward to the left. Watch your passenger-side mirror. You are looking for a specific visual reference point. When you see the full front of the vehicle parked behind the empty space appear in your passenger-side mirror, that is the moment you stop the first turning phase.
This reference point is the mirror trick that experienced drivers use consistently. It removes guesswork from the most critical transition in the maneuver.
Step 3: Straighten Briefly, Then Turn Full Left
When the rear vehicle’s full front appears in your passenger mirror, briefly straighten your steering wheel. Then turn the wheel fully to the left. One full rotation or until it reaches the left-side limit.
Continue reversing slowly. Your vehicle’s rear is now swinging toward the curb. Watch both mirrors. You are bringing the rear of the vehicle parallel to the curb while keeping your front clear of the vehicle in front.
Step 4: Watch the Curb and Straighten the Wheel
As your vehicle approaches a position parallel to the curb, straighten the steering wheel. Continue reversing only slightly to adjust your front-to-back position within the space.
Your vehicle should now be sitting parallel between the two cone markers, within 12 inches of the curb. If you are more than 12 inches from the curb, pull forward slightly with a small rightward correction on the steering wheel, then reverse again. Small adjustments at this stage are expected and acceptable. The Massachusetts road test examiner evaluates your final position, not how many adjustments you made.
Step 5: Center Yourself in the Space
Pull forward to center your vehicle between the two cone markers. Leave approximately equal space in front and behind. Check your distance from the curb one more time using your passenger-side mirror.
Step 6: Signal Left When Pulling Back Into Traffic
When you are ready to pull out of the space, activate your left turn signal. Check your driver-side mirror, your rearview mirror, and your blind spot. When traffic is clear, pull forward into the lane smoothly.
This signal is the step most students forget. They complete the parking maneuver correctly and then pull back into traffic without activating the left signal. The examiner notes this as a signal deduction even when the actual parking was perfect.
How to Signal for Parallel Parking: The Complete Sequence
Signaling for parallel parking has two mandatory moments that both appear on the Massachusetts road test scoring sheet.
Signal 1: Before you begin parking. Activate your right turn signal as you approach the space and before your vehicle stops. This signal must be active when you begin positioning your vehicle alongside the parked car in front of the space.
Signal 2: Before you pull back into traffic. Activate your left turn signal before pulling out of the completed parking space. Check mirrors and blind spot, then proceed when clear.
The most commonly missed signal is Signal 2. Students are focused on completing the parking maneuver and mentally consider the task finished once the car is in the space. The examiner’s scoring sheet does not consider the task finished until the vehicle is safely back in traffic with the correct signal.
Additionally, if the road test requires you to parallel park and then immediately stop the vehicle for post-parking evaluation, you may not need to execute Signal 2 during that specific evaluation sequence. Your examiner will clarify. In all real-world situations and most road test sequences, Signal 2 is required.
The 1-2-1 Method Explained
The 1-2-1 method is a simplified steering count that removes the need to memorize precise visual reference points. It works as follows:
Turn 1: Turn the steering wheel one full rotation to the right when you begin reversing.
Turn 2: When your reference point appears in the passenger mirror, turn the wheel two full rotations to the left.
Turn 1: When your vehicle is nearly parallel to the curb, turn the wheel one full rotation back to the right to straighten.
The 1-2-1 count works reliably in average-sized sedans. It becomes less reliable in very compact cars or large SUVs because steering ratios differ between vehicles. If you are using this method, calibrate it specifically to the vehicle you will use on your road test. Practice the count in that vehicle until the physical result is consistent.
CMSC’s instructors teach the mirror reference method as the primary technique because it adapts to any vehicle without recalibration. The 1-2-1 count is a useful backup for students who find visual reference points harder to internalize quickly.
How to Parallel Park with Cones: The Massachusetts Road Test Setup
The Massachusetts road test parallel parking evaluation uses cone markers placed approximately 20 to 25 feet apart. Understanding this setup before your test date removes uncertainty from the evaluation environment.
Setting up cones for home practice:
Place two cones or markers approximately 22 feet apart on a flat surface. Position the cones approximately 2 to 3 feet from the line that represents the curb. This simulates the road test space accurately. Mark the curb position with chalk or rope on a flat surface if practicing in a parking lot.
The reference points change with cone spacing. A 20-foot space requires a tighter initial angle than a 25-foot space. Practice at both measurements so that neither feels unfamiliar.
Contact with a cone results in a deduction. Rolling over a cone, rather than simply touching it, typically fails the parking component entirely. Maintain a slow pace that gives you time to observe and stop before contact occurs.
Distance from the simulated curb is evaluated at the end. Finish within 12 inches of the curb line. During home practice, use a measuring tape for the first several sessions. Most students are surprised by how close 12 inches actually looks from the driver’s seat. Building the visual calibration for 12 inches in practice removes the guesswork on test day.
Parallel Parking Tips for the Driving Test
What the Massachusetts Road Test Examiner Specifically Scores
The Massachusetts road test evaluates parallel parking against specific criteria that your instructor knows and your examiner applies consistently:
- Entry signal: Right turn signal activated before approaching and positioning alongside the front vehicle
- Observation sequence: Mirror check and physical blind spot check before reversing
- Maneuver execution: Clean entry without cone contact
- Final position: Within 12 inches of the curb, parallel to the curb line
- Exit signal: Left turn signal before pulling back into traffic
- Traffic awareness: Mirror and blind spot check before exiting the space
A student can execute a technically clean parking maneuver and still receive multiple deductions for missed signals and skipped observation steps. These procedural elements must be automatic before the road test. They cannot be reliably added under evaluation pressure if they were never built into practice sessions.
Common Mistakes That Fail Students
Touching the cones: This is the most common failure cause. It results from incorrect mirror reference calibration, turning at the wrong moment, or entering the space too fast to stop before contact.
Finishing too far from the curb: The student overshoots the leftward turning sequence or straightens the wheel too early. The vehicle ends up 18 to 24 inches from the curb, which is a clear deduction.
Forgetting to signal before beginning: The student is focused on the physical sequence and the signal drops from the sequence before the vehicle is even in motion.
Forgetting to signal when exiting: The most common post-maneuver error. The student completes parking, pulls forward to center, and immediately pulls back into traffic without the left signal.
Rushing the pace: The most correctable error on the list. Every other error becomes more likely when the vehicle is moving too fast to observe and respond. Slow pace is the single adjustment that most consistently improves parallel parking outcomes.
How to Practice Parallel Parking at Home
Setting Up a Practice Space
You need two cones or markers, a flat surface, and a chalk or rope line to represent the curb. The setup:
- Mark a straight line approximately 20 feet long to represent the curb
- Place the first cone at the starting end of the line, 2 to 3 feet from it
- Place the second cone 22 feet away along the same line, same distance from it
- Position a marker or cardboard box to represent the front parked vehicle
- Position a second marker 22 feet behind it to represent the rear parked vehicle
Practice the full sequence including both signals at every repetition. Practice with the specific vehicle you will use on your road test. Calibrate the visual reference points for that vehicle specifically.
Building Consistency Before Test Day
Run the maneuver a minimum of 10 times in a single session before moving the cones closer. Once you can complete the sequence cleanly at 22 feet, reduce the spacing to 20 feet. Once you are consistent at 20 feet, you are prepared for any space the examiner presents.
Practice does not make perfect. Perfect practice makes perfect. Each repetition should include the full signal sequence, the full observation sequence, and the mirror reference check. Partial practice builds partial habits.
Why Choose CMSC for Parallel Parking Instruction in Central Massachusetts
Parallel parking instruction at most driving schools means running the maneuver a few times during behind-the-wheel lessons. What CMSC offers is something more specific and more effective than that.
CMSC’s Parallel Parking Bootcamp is a dedicated, standalone parallel parking program built around one goal: getting you to pass this specific maneuver on the Massachusetts road test. The session is not a general driving lesson with parallel parking included. It is a focused, structured program that targets the exact technique gaps that produce road test failures.
The Bootcamp covers mirror reference calibration for the specific vehicle you will use on your test, the full signal sequence built into every repetition, the cone setup that matches Massachusetts road test dimensions, the observation sequence that satisfies the examiner’s scoring criteria, and the pacing discipline that eliminates most contact errors. It includes a pass guarantee. Students who complete the Parallel Parking Bootcamp and still fail the parking component of their road test receive a follow-up session.
CMSC’s instructors who deliver the Bootcamp include professionals with Massachusetts law enforcement and commercial driving backgrounds. Their experience with high-precision vehicle placement under real-world pressure translates directly into the instruction quality inside the Bootcamp sessions. They know which specific moment in the maneuver most students lose the parking attempt, and they know how to correct it.
CMSC’s teen driver’s education program builds parallel parking into the curriculum progressively throughout the behind-the-wheel instruction phase. Students who complete the full program encounter parallel parking first in low-stakes practice conditions, then in increasingly accurate representations of the road test setup, before the final evaluation conditions session. They arrive at the road test having practiced parallel parking with cones, in a CMSC vehicle, on the road types used by Worcester and Leominster RMV examiners.
For adult drivers who failed a road test specifically because of parallel parking, the Bootcamp is the most direct path to resolution. It does not require re-enrollment in a complete driver’s education program. It is available as a standalone session for any licensed driver or permit holder who needs to address this specific gap.
CMSC’s road test preparation and sponsorship service connects directly to the Bootcamp for students who want both targeted parking instruction and managed road test logistics. The warmup lesson on the morning of the exam typically includes a final parallel parking calibration session in the test vehicle before the examiner arrives.
Conclusion
Learning how to parallel park step by step is a skill acquisition process, not a talent discovery process. The technique is consistent. The reference points are learnable. The signal sequence is buildable into automatic habit. The mirror trick works in any vehicle once calibrated correctly. The 1-2-1 method provides a reliable starting point. The Massachusetts road test evaluates specific, known criteria. None of that is uncertain or unpredictable.
What produces the failures is practicing the wrong version of the skill through repetition in the wrong setup. The parallel parking method in this guide, practiced with the correct cone spacing, in the correct vehicle, with the full signal and observation sequence included in every repetition, produces reliable, consistent results on the Massachusetts road test. If you want an instructor to calibrate the mirror reference points to your specific vehicle and eliminate the remaining uncertainty before your test date, CMSC’s Parallel Parking Bootcamp is the fastest path to that outcome.